Thursday, December 1, 2016

FIRE ISLAND HOSTA

Since I have been taking over the 52 Quilters blog this week, I figured I could post my posts on both so everyone can see them.

Well it is probably not a surprise by now that I am a fan of paper piecing.  I took my first class a few years ago and was hooked then and there.  I have projects that I have bought the fabric for and started the cutting process but then they have been put back into a box for a later date, I have some that are partially finished and then there are those that were completed and are out for me to enjoy.

This year Ben and I decided to take a technique of the month class.  It ran from June to Dec, for a total of eight classes.  Quiltworx has some patterns that only certified shops or certified instructors can sell.  I talked to the instructors about maybe straying from the path and trying out a different pattern.  I just loved the centers of some of the patterns with the curved leaf shapes and thought it had a lot of techniques that I had not done yet.  They told me it wouldn't be a problem, so I decided on the Fire Island Hosta Queen pattern.  I started by just looking at the batik section to find an inspiration for the main color theme of the quilt.  I tend to lean toward cooler colors and wanted to do something different from what I had done in the past.  I decided on an orange color palette to start.  I spent over two hours in their classroom with stacks of bolts of fabrics.  Having done quiltworx patterns before, I kind of knew how to look for the colors, where they were going to go and how to play off of other colors that were already in the quilt.  I worked my way from the center out, first picking the leaves, how they would flow together and so on.  I decided I wanted to end the quilt in a darker color, something that would almost frame the center.  This is what I came up with.

My color pallet 
Pattern 


We got home and I started to do the cutting.  Quiltworx has such specific cutting instructions that it makes cutting a breeze.  I made a little color chart, so I know which fabric went with which number, I precut my pieces and put them into their respective bags.  After all of the precutting was done I went back in and cut out my template pieces for each bag and everything was ready to start being put together.


Pre-Cut Pieces in their 18 bags
My class kit box, everyone 
 We had our first class and I worked on 1/2 of the first leaf.  There were only 4 leaf halves and it took me all day to do this.  I tend to get in a zone and things go pretty quick but this was just not happening, turns out that each individual leaf had almost 40 pieces and that is why it was taking so long.  I wasn't having it, so I got home and finished that leaf and started right onto the next side.  Before the next class two or three weeks later, I worked and worked.  There were some areas I wasn't quite sure on, so I skipped those and moved onto techniques I had done in the past.  By the next class I had almost all of my pieces completed.  I talked to the instructors about piecing things I wasn't sure about and they were a HUGE help with different ways they were taught to do it.  This quilt was a little different, as it was constructed from the outside in, so we talked and I worked.  When I got home I finished the center and started to put on the final borders.  By the time the next class rolled around I came with my completed quilt.  I was so excited to share it and everyone was shocked that I was done so fast.  I just couldn't stop working on it.  Lucky for me, I had another Quiltworx kit ready to start with some new techniques I had not done yet either, so I started on that one.  I just so happened to finish this one up the day after Thanksgiving, leaving me with my Indian Summer quilt to complete.  Our last class is Saturday and I am hoping to get most of it done then.

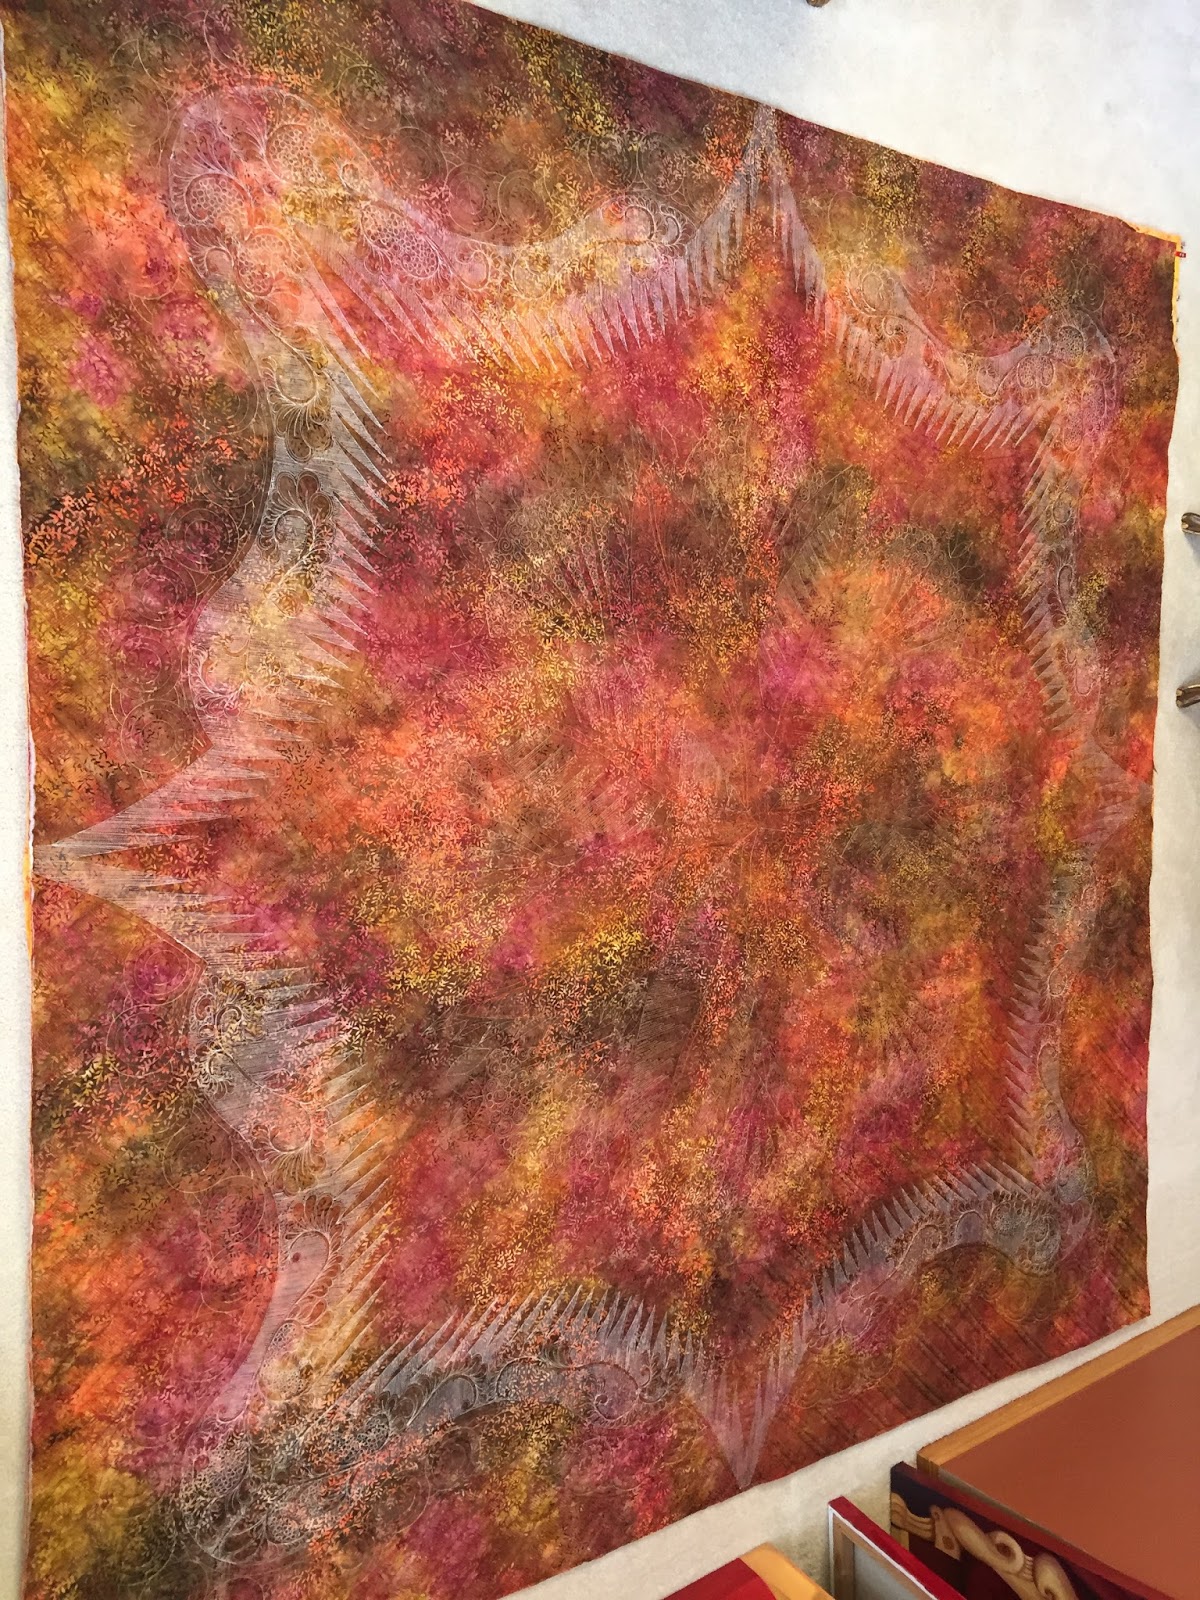
This quilt was quilted by Susan Miner at http://www.trendythread.net, SHE IS AMAZING.  She has worked on two of my quilts and I might have cried each time I got one back.  It's so amazing what a long arm quilter can do to enhance a quilt but not take away from the design.  Here are some pictures of the process and the final product.  I am just getting the binding on, so it's not all the way completed but it has a bed to lay on when it is done.

1st 4 leaf halves
Same 4 leaf halves trimmed


Now for the completed quilt, well I still need to sew the binding to the back.


 I had to put some pictures of the back just so you can see how amazing this quilting is.


Thursday, November 24, 2016

LET'S TRY THIS AGIAN

Hi all,

I hope you all have had a wonderful year.  There were a few set backs but all in all the year has been more than great.  Ben and I are really settling into our lives here in Eugene and are so lucky to be meeting some wonderful people and making new friends along the way.  Let's not forget our old friends that we are coming back together with and loving them even more.  We have had some additions to our Eugene extended family this year and have just loved every minute of living here.  We have kept busy both in our work and home lives and can't wait to share it with everyone.  My goal is to start posting each week and I really hope I can follow through with it this year.

Hope all is well and I am Thankful for everyone past, present and future who will shape our lives in any way.

Happy Thanksgiving to you all

Adam

Saturday, January 23, 2016

It's a Patchwork City, Group 1

I bought Patchwork City: 75 Innovative Blocks for the Modern Quilter by Elizabeth Hartman a while ago and I have finally come around to getting started on it.  Craftsy was having a sale on a mystery fat quarter bundle from Freespirit Fabric, so I bought that and I have started.  I am also getting started on a small wall quilt for the office using Robert Kaufman's Color Union, so I decided I would use some of these prints as accent pieces in all of the blocks.  I am planning on making all 75 of the blocks in the book, so this will not be a quick project.

Here are my first three completed blocks: Post Office Box, Intersection and Kiosk


I think all of the colors are looking good and the Color Union prints really pop.  I also fussy cut the ship in the kiosk block.  I had a few issues putting together the intersection block.  The book came with templates and two ways to get them.  There were paper templates in the book that could be traced but there is also an option to download a PDF that can be printed right on freezer paper.  I elected the second choice.  I printed the template out, cut it with my old rotary blade and ironed it onto my fabric.  The directions say to cut out the pieces adding a 1/4 inch seam allowance on all sides, so that is what I did.  When i was done piecing the hourglass part of the Intersection block, the directions said it should measure 4.5 inches and came in at 4.25.  I checked my seams and everything looked good but I decided to make another just in case.  The second time I was very careful to make sure all of my cutting was correct, I took extra time lining up my corners and everything.  I pieced it all together, took it to the iron and measured it again......4.25 square again.  I am guessing there is a printing error or there is something special that needs to be done when adding seam allowance to a triangle.  I decided to just go with it and put the rest of the block together.  I started asking around and it turns out that I am not the first person to have some of these issues.  I decided I'm going to stick with it because I already bought the fabric and I can hide some of the differences with the final quilt layout.  I'm still looking forward to completing this quilt and I will keep you all updated on the progress.

The next three blocks will be:  Porch, Meow, and City Hall...

-Adam-

Sunday, January 17, 2016

New Year, New Projects

Hey All,

Hope you had a wonderful holiday and a very Happy New Year.  We were so busy in December.  We had a Holiday Party, made tamales, we traveled down to Sacramento for Christmas, I made three dresses for gifts and we still had to get our work done.  Life is still going strong and we are looking forward to where this New Year will take us.

Some pictures from our trip down South (after the snow), Duchess and Pixley chilling on the couch.


Ben's friend Shannon at work came over and we made tamales.  It was my first time making them by myself.  I was nervous but everything came out delicious.  I made everything from scratch and my grandma was definitely watching over me.  We had such a good time during the process, so I'm sure it will become a tradition in our home. Cheese for Ben and I and pork for Shannon.                            


Here are a few pictures of the dresses that went out for Christmas.  They are both patterns from Figgy's.  Her construction makes everything look so polished and professional.  The red dress is her Scirocco pattern.  We have made this pattern a few times and continue to love it.

The twin dresses are the Sunki dress.  They were made for two cousins that are best friends.  I used some Tula Pink fabric and think they are so fun with all of the color and the cute butterflies.  You can't really tell from the picture, but the center of the front is an hourglass shape with cutouts on the side.  In some of the versions that I have made, these were contrast fabric but I wanted to see how good I was at lining thing up and after I finished these, I gave myself a huge pat on the back.


There is still so much to share but I will leave it at this for now.  Wishing everyone a wonderful year. Best wishes to you all.

Adam & Ben

One last picture of my deer friends who visit every week or two.


Thursday, December 17, 2015

Every Tree Needs A Skirt

HAPPY HOLIDAYS EVERYONE

Two years ago, Ben and I took our first paper piecing quilt class.  We both love the looks that can be accomplished through paper piecing; points are so sharp and seams line up so nicely.  Last year we saw a few patterns for Christmas tree skirts that we liked and decided that we would make one this year.  During the late summer, we drove out to Philomath Oregon to visit the ladies at JanniLou Creations, a quilt shop that specializes in Judy Niemeyer paper piece quilt patterns and we bought one we loved and some batik fabrics we thought would compliment our tree.


I am happy to say that it is completed and I couldn't be happier with the way it turned out.  There was a lot of time put into this skirt and it looks great with our tree.  I have to say a big THANK YOU to Susan Miner for her wonderful quilting (check her out at Trendy Threads.)  

I put all my faith into her and I was knocked off my feet with her talent.  The quilting really brought out the different sections of the quilt and I love what she did with every section.  I can't say enough good things about her and I think I hugged her 5 times when I saw what she did.


We hope you all have a wonderful holiday!!!


Friday, November 27, 2015

At It Again

I know it's been a while since I have written a post.  I was at a local quilt shop (Something to Crow About) talking with the owner Kennette and after showing me her blog, she kicked my but and got me motivated again to update mine.

We had some family up for our first Thanksgiving, so I snapped a few shots of the table and the food.


 Ben and I went vegetarian about a year and a half ago, so this year I made an UnTurkey.  It came out delicious.  I know it sounds a little weird but it really was so good.


We had such a great day spending time with our family in our new home.  We didn't even make a dent in the food though, so I guess we will be eating leftovers for the next three weeks.

On a side note, Ben picked up some new fabric and we have decided to start the Sampler Block Shuffle.  We are 12 blocks behind, so we have to get sewing.  We will keep you updated.

Till next time....

Wednesday, March 18, 2015

OUR NEW ROOTS

It has been over a year since there have been any updates and I think it's time to start this blog up again.  What can I say, Life got in the way.  In the past year we completed a bunch of projects, purchased another sewing machine and made a move from California to Oregon.  We have met lots of new quilters and sewers to inspire us and now we just closed on a new home.  Considering the move, I thought this would be a good way to keep our families and friends up to speed with what is going on in our lives.  Over the next few weeks I will try to post to get everyone up to speed on what we've done over the past year, and our lives we are starting here in Oregon.


Here are some before pictures of our new home.  We have some painting and some updating to do but this is what it looked like on closing day.  I cant wait to see if after all our furniture is in and our updates are done. 

The dining and living rooms.  We have already started taking the yellow wallpaper off the walls to realize there are two more layers under it.  Removing this is the plan for the coming weekend.


This room will become my office.


These are pictures of the main living areas, Kitchen, Kitchen Nook and Family Room.  I can't wait to see what these rooms will look like after some color on the walls and our furniture in them.  We did find a round cherry table for the nook.  it will be different not eating dinner on the couch.


The staircase that leads to the second floor.  Up here we have a bathroom, bedroom and bathroom for visitors, the master bedroom and most important, the sewing room.


Outside we have a wraparound deck, we have to have it rebuilt because it is old but we are excited to see the finished product with the new materials we decide to use.